
Cleaning window sills and tracks is often overlooked, yet it plays a crucial role in maintaining the beauty and hygiene of your home.
Not only do clean window sills enhance the overall appearance of your windows, but they also contribute to a healthier living environment by reducing dust and allergens, which can settle in hard-to-reach corners.
This article explores the benefits of cleaning window sills, and the essential tools needed such as sponges and brushes, and provides a step-by-step guide to make the task easy and effective.
Tips for keeping your sills in pristine condition year-round are also included, along with some handy cleaning hacks.
Dive in to discover how you can enjoy sparkling clean window sills with minimal effort!
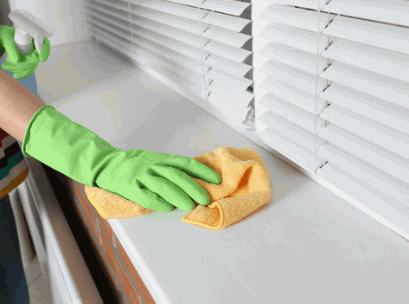
Table of Contents
Cleaning window sills is crucial for maintaining a clean and healthy home environment. Over time, window sills accumulate dust, dirt, and grime that can lead to mould growth and other issues if not addressed. Consider using a steam cleaner for an even more efficient clean.
Regular cleaning of window sills not only enhances the aesthetics of your home but also contributes to better indoor air quality, especially for individuals with allergies or respiratory conditions. Moreover, keeping window sills clean extends their lifespan and prevents deterioration, making it an essential part of home maintenance that should not be overlooked.
Delve into: How To Pressure Wash A Deck
Cleaning window sills offers numerous benefits that go beyond mere aesthetics; it significantly improves air quality and helps prevent mould and grime build-up, ensuring a more inviting and healthier home.
Regularly maintaining these areas can contribute to a healthier living environment. Here are some key advantages of keeping window sills clean:
Incorporating this simple household chore into regular cleaning routines not only protects one’s investment in the property but also fosters a more pleasant living space.
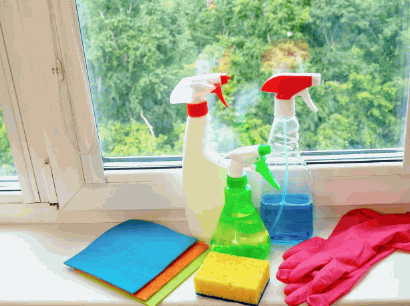
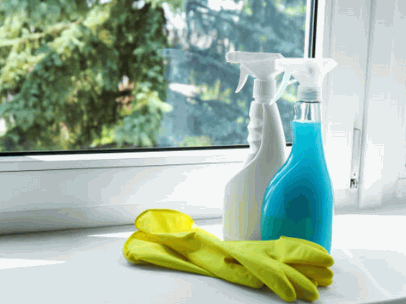
To effectively clean window sills, having the right tools and supplies is essential. The recommended cleaning tools include a variety of sponges, brushes, and microfibre cloths, each serving distinct purposes in the cleaning process. Additionally, essential oils can be added to your cleaning solution for a pleasant aroma.
For instance, a hard-bristle brush can tackle stubborn grime, while a soft microfibre cloth is perfect for wiping down surfaces without scratching. Additionally, an appropriate cleaning solution, such as a vinegar-water mix or specialised cleaning sprays, can enhance the effectiveness of your cleaning routine, ensuring that all dirt and mould are eliminated efficiently.
Essential cleaning tools for window sills include sponges, brushes, and microfibre cloths, each offering unique advantages for effective cleaning.
Utilising the right cleaning tools can significantly enhance the results of the cleaning process. Sponges, for instance, are versatile in nature; they can gently scrub away grime without scratching delicate surfaces. Their porous texture allows for the effective absorption of water and cleaning solutions, ensuring that even stubborn dirt is lifted away efficiently. Consider using a magic eraser for particularly tough stains.
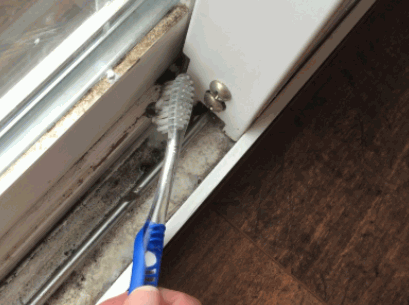
Choosing these specific tools is pivotal for achieving immaculate window sills, ensuring not just cleanliness, but also the preservation of the surfaces involved. For extra precision, you might want to use a cleaning toothbrush for hard-to-reach areas.
Recommended cleaning solutions for window sills include vinegar, bicarbonate of soda, and even a diluted bleach solution, each effective in removing dirt and grime. For those tackling severe stains, hydrochloric acid may also be considered, though caution is advised.
These cleaning agents are not only affordable but also widely accessible, making them excellent options for maintaining a clean and inviting home environment. Research shows that these methods are both safe and effective.
For instance, vinegar acts as a natural disinfectant, cutting through mould and odours while leaving behind a fresh scent. In contrast, bicarbonate of soda serves as a gentle abrasive that can tackle tougher stains without scratching surfaces.
When considering a bleach solution, it’s crucial to remember that proper dilution is essential—typically, one part bleach to ten parts water is recommended for effective yet safe cleaning. It's always advisable to conduct a patch test, particularly on sensitive materials, to avoid any damaging effects. Some people also recommend using essential oils to mask the bleach scent.
Below is a simple guide to using these solutions effectively:
Remember, always ventilate the area and use gloves when handling strong chemicals for safety.
Cleaning window sills can be a straightforward process if you follow an effective step-by-step method. The first step is to gather all necessary cleaning supplies, including your cleaning solution, microfibre cloths, brushes, and any additional tools such as a steam cleaner for stubborn grime. For best results, using a hard bristle brush can help in removing ingrained dirt.
This guide will detail each step, from removing loose dirt and dust to applying the best cleaning techniques to ensure your window sills are spotless and fresh. By following these steps diligently, and using appropriate tools like a vacuum with a nozzle attachment, you can maintain the cleanliness of your window sills, leading to a more inviting and healthier home.
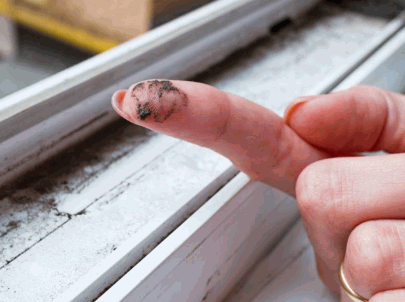
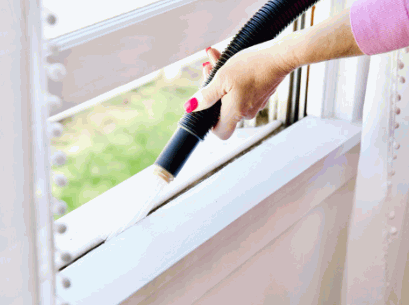
The first step in cleaning window sills is to remove any loose debris, such as dust and dirt that may have accumulated over time, before proceeding with more thorough cleaning techniques that will ensure the sills maintain their pristine appearance. An attachment for your vacuum can be very useful in lifting away this initial layer of grime.
To effectively tackle this task, it is essential to equip oneself with the right tools and methods. Begin by gathering a few key items: a soft brush, a vacuum cleaner with an attachment, and microfiber cloths.
Start by using a soft brush or a vacuum cleaner to gently sweep away any dust and loose particles. Make sure to get into the corners and crevices, where dirt often hides.
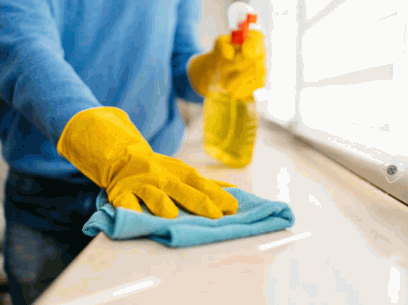
After removing the visible debris, it is beneficial to dampen a microfiber cloth with the soapy water solution and wipe down the sills. This step helps in lifting any remaining grime, thus preparing the surface for deeper cleaning. Sometimes, adding a bit of baking soda to the cloth can help tackle tougher spots.
Following these techniques will ensure that the window sills are not just clean, but also primed for their next stage of care.
After removing loose debris, vacuuming or dusting the window sills is essential to eliminate any remaining dust and dirt particles.
Taking this extra step can greatly improve the air quality in your home and enhance the overall cleanliness of the space. To effectively approach the task, follow these tips from experts like Ann Farron and Detail Geek:
Following these methods can ensure that window sills remain clean and welcoming. Applying a small amount of essential oils can also leave a pleasant scent in your home.
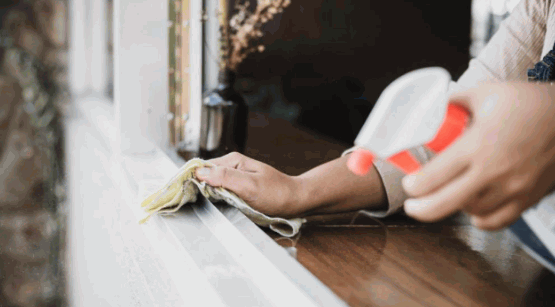
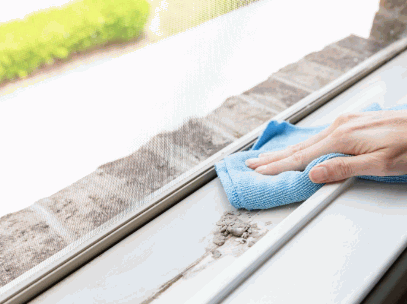
Once the sills are free of loose debris and dust, it is time to apply a cleaning solution, such as a vinegar and water mixture, to effectively wipe down the surfaces. Using a microfiber cloth will help in achieving a streak-free finish.
To prepare this natural cleaning solution, you will want to mix a 1:1 ratio of vinegar and water in a spray bottle. This dilution not only makes the solution less harsh but also keeps surfaces safe. Make sure to shake the bottle gently to combine the ingredients thoroughly. Adding a few drops of essential oils can enhance the scent while cleaning.
When applying the solution, spray it lightly onto the sills and allow it to sit for a few minutes. This wait time allows the cleaning properties of the vinegar to penetrate any stubborn grime. For more challenging areas, consider using a soft cloth or sponge to scrub gently.
Embracing natural solutions like these not only promotes a healthier home environment but also contributes to sustainability, making it a wise choice for eco-conscious individuals. For instance, using reusable wipes can reduce waste and chemical exposure.
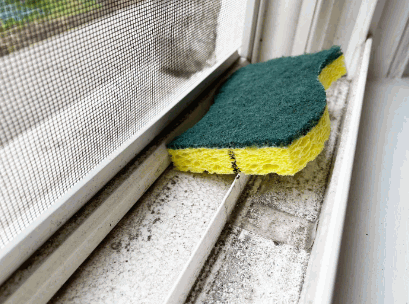
To tackle stubborn stains on your window sills, use a scrubbing tool like a magic eraser, different cleaning brushes, or a hard-bristle brush to ensure thorough cleaning.
Plus selecting the right scrubbing tool, consider utilising effective cleaning solutions that can enhance your efforts. For instance, a mixture of warm water and washing-up liquid can work wonders for light stains, while a paste made of baking soda and water can tackle tougher grime.
This combination of techniques and tools will not only improve the appearance of your window sills but also help maintain their condition over time. For tougher outdoor stains, consider using a pressure washer to clean window sills more effectively.
After scrubbing, rinsing the window sills is crucial to remove any leftover cleaning solution and dirt, followed by drying them thoroughly.
This step is vital for maintaining the integrity of the surface and ensuring that it looks its best. During the rinsing process, clear, warm water should be used to effectively wash away any residual soap and grime. Pay attention to the corners and crevices where dirt often accumulates. Once rinsed, the next phase involves drying; it is essential to ensure that no moisture remains, as dampness can lead to mould growth.
Thorough drying can be achieved by using absorbent towels or even a squeegee. For larger surfaces, consider utilising a fan or dehumidifier to expedite the process. Remember, the longer the moisture sits, the higher the chance for mould and other unwanted growth:
To maintain clean window sills, it’s important to implement regular cleaning routines and a few simple tricks that prevent dirt and grime build-up. Influential cleaning guides often provide great tips for such tasks.
The frequency of cleaning your window sills depends on various factors, including your home environment and local climate, but it is generally recommended to clean them at least once every season. Seasonal maintenance is crucial to ensure that dirt and allergens do not accumulate, which can affect both the aesthetic appeal and health of your living space.
For households situated in polluted urban areas, cleaning window sills may be necessary more frequently, possibly every month, to combat grime and dust that can settle easily. Conversely, homes in rural locations may only require a seasonal clean, given that there is less airborne debris. Those living in places prone to heavy winds or storms should also consider more regular maintenance to keep sills free of debris.
Implementing a routine can help in preventing long-term damage, as neglecting to maintain these surfaces can lead to mould growth and potentially compromise window integrity. As recommended by a cleaning expert, keeping these routines consistent is crucial.

Implementing preventative measures can significantly reduce the amount of dirt and grime that accumulates on window sills, making cleaning easier. By adopting a consistent routine that includes various techniques and products, homeowners can effectively protect their windows from the elements and other contaminants, which may otherwise lead to more extensive cleaning efforts down the line.
To enhance cleanliness and reduce maintenance tasks, the following strategies are advisable:
Incorporating these preventative maintenance strategies into a regular cleaning regimen will not only enhance the appearance of windows but also prolong their lifespan.
Maintaining clean window sills is a simple yet effective way to enhance the overall aesthetic and health of your home.
By regularly attending to this often-overlooked area, individuals not only elevate the visual appeal of their living spaces but also promote a healthier environment by minimising dust, allergens, and potential insect habitation. It’s important to recognise that clean window sills contribute to better indoor air quality and overall well-being.
For these reasons, adopting a regular cleaning routine is a small commitment that yields significant benefits. Establishing a simple checklist or routine can make this task manageable and invigorate the entire atmosphere of your residence.