For those seeking to update their kitchen with contemporary aesthetic, spray-painting kitchen cabinets can be a transformative solution. This DIY guide outlines the advantages of spraying kitchen cabinets, such as time and effort savings, as well as the attainment of a flawless finish. It provides a comprehensive list of essential tools and materials, detailed step-by-step instructions for the spraying process, and valuable painting tips to ensure the success of the project. Transform your kitchen efficiently and elegantly.
Find out more: Can You Paint Commercial Floor Tile
Table of Contents
Kitchen cupboards are fundamental storage elements in any residence, particularly within the kitchen, where they fulfill both functional and aesthetic roles. These cupboards not only accommodate essential kitchen items such as dishes and cookware, but they also significantly influence the overall layout and design of the kitchen.
Homeowners frequently explore a variety of styles, materials, and finishes for their cupboard doors and drawer faces to enhance the visual appeal of their kitchens. Furthermore, kitchen cupboards can serve as a focal point within a kitchen island, thereby contributing to the functionality of the space and supporting broader home improvement initiatives and the overall kitchen layout.
Spray-painting kitchen cabinets represent an effective and cost-efficient approach to achieving a budget-friendly update or budget refresh during a kitchen makeover, resulting in a high-quality paint finish that significantly transforms the kitchen's appearance. This DIY guide outlines the advantages of utilising spray techniques in comparison to traditional painting methods, facilitating a smooth application and superior paint adhesion, especially when using a paint sprayer.
Choosing to paint cabinets not only enhances aesthetic appeal but also prolongs the lifespan of the cabinetry, making it a prudent option for homeowners seeking to improve their kitchen without engaging in extensive renovations.
One significant advantage of spray-painting kitchen cabinets is the substantial time and effort it saves compared to traditional painting methods, thereby enhancing the efficiency of the painting process and contributing to a cost-effective renovation. Utilising a paint sprayer, such as the Wagner Flexio 5000, facilitates quick coverage of cabinet doors and drawer fronts, significantly reducing the hours typically spent on manual brushing or rolling.
The airless sprayer technology allows for a uniform application, resulting in a quality finish with fewer coats of paint, further optimising the overall efficiency of the renovation project, including a reduction in drying time.
Along with the speed it affords, spray-painting minimises the mess commonly associated with traditional methods, making cleanup more manageable for those engaged in DIY projects. The use of an HVLP (High Volume Low Pressure) spray gun effectively reduces overspray, which not only conserves paint but also maintains cleanliness in surrounding areas, ensuring a clean and professional finish. When paired with fast-drying paint, the benefits are amplified:
Ultimately, the capability to apply multiple coats swiftly ensures that kitchen cabinetry receives a durable surface, capable of withstanding daily wear and tear, thereby elevating the overall aesthetic of the space.
Spray-painting kitchen cabinets offer a remarkably smooth finish, distinguishing it from traditional painting methods that frequently leave brush strokes or uneven surfaces, and is especially effective when using high-quality paints like Benjamin Moore or Rustoleum. The spray technique facilitates a fine mist application of high-quality paints, such as Zinsser Allcoat, Cabinet Coat, or Rustoleum, which adhere effectively and yield a flawless finish. The use of self-priming paint, like Stix Waterborne Bonding Primer, further enhances adhesion and durability, ensuring that the final outcome is professional and visually appealing, thus contributing positively to the aesthetic enhancement of the home.
Achieving this smooth finish is essential not only for visual appeal but also for longevity, as it helps mitigate chipping and wear, withstands environmental impact, and reduces the need for frequent re-painting. An even coat of paint can transform cabinets into striking focal points in the kitchen, thereby elevating the overall design.
When selecting high-quality paints, such as Zinsser Allcoat or Benjamin Moore, the advantages extend beyond mere appearance; these products typically offer superior coverage and enhanced resistance to stains. Proper preparation techniques, including meticulous sanding, de-glossing, and cleaning of surfaces with sugar soap, play a critical role in this process.
By ensuring that every surface is adequately prepared, the paint can bond effectively, resulting in an impeccable finish that homeowners will appreciate for years to come. Consequently, investing both time and resources into paint quality and preparation is essential for kitchen cabinets that not only possess aesthetic beauty but also endure over time.
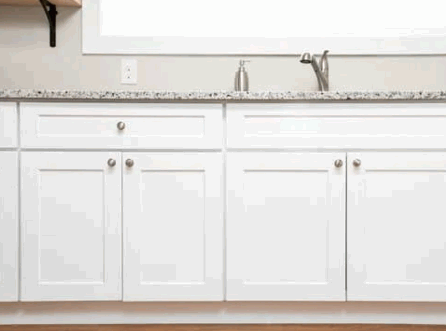
Spray-painting kitchen cabinets offer a significant opportunity for customisation, allowing homeowners to select colours and finishes that align with their vision for a kitchen renovation. This flexibility also extends to the choice of cabinet hardware, such as knobs and pulls, which can either complement or contrast with the newly painted surfaces, thereby enhancing the overall aesthetic of the kitchen.
The wide range of customisation options available makes it straightforward for homeowners to personalise their spaces, accommodating individual styles and preferences while achieving a cohesive look throughout the kitchen.
Homeowners have the opportunity to explore various options, such as matte, glossy, or satin finishes, each of which can dramatically alter the appearance of their cabinets. Current colour trends include bold blues and soft greys, which not only create an inviting atmosphere but also make a striking statement. For example, pairing a deep navy with brushed brass hardware not only introduces a modern touch but also enhances the warmth of the space.
When selecting the perfect colour, considerations should include the overall theme of the home and existing décor. Matte finishes convey a contemporary aesthetic, while glossy surfaces can impart a sleek and polished appearance.
By carefully choosing hardware, such as knobs and pulls in contrasting finishes like black or chrome, homeowners can achieve an updated yet timeless aesthetic in their kitchens.
By integrating these various customisation options, homeowners can create a personalised environment that reflects their unique tastes and lifestyles.
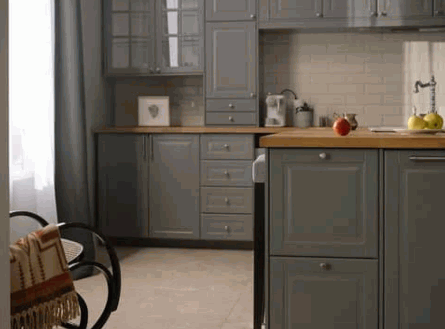
To successfully spray-paint kitchen cabinets, it is essential to gather the appropriate tools and materials, such as a paint sprayer, primer, topcoat, and safety gear, as this will significantly enhance the efficiency and quality of the project.
A high-quality paint sprayer, such as the Wagner Flexio or an HVLP spray gun, is vital for achieving an even application of the chosen paint, whether it is a self-priming option like Stix Waterborne Bonding Primer or a traditional paint.
Furthermore, it is important to have sandpaper for surface preparation, dust sheets to protect surrounding areas, and painter's tape to mask off edges, all of which will contribute to a clean and professional finish.
Additionally, one should not overlook the importance of safety gear, including masks and goggles from brands like 3M, to ensure personal protection during the painting process.
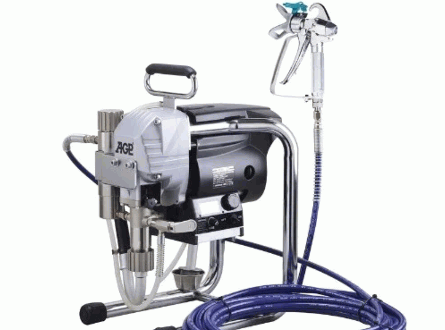
A paint sprayer is a critical tool for individuals aiming to achieve a professional-quality finish when spray-painting kitchen cabinets, ensuring a smooth and durable surface. The Wagner Flexio 5000 is a highly regarded option among DIY enthusiasts, as it combines versatility with user-friendliness, accommodating both fine and broad spraying applications, making it ideal for painting cabinets and other furniture. The selection of an appropriate paint sprayer, whether it be an airless sprayer or an HVLP (High Volume Low Pressure) spray gun, plays a crucial role in influencing the final appearance of the cabinets and the overall efficiency of the project, especially during a kitchen renovation.
A thorough understanding of the differences between various paint sprayers can facilitate well-considered choices during the renovation process.
When selecting a sprayer, it is essential to consider the type of paint intended for use, the size of the area to be painted, the budget available, and the desired paint finish. For individuals who are new to spray painting or who desire a straightforward clean-up process, options such as the Wagner Flexio 5000 may be the most suitable choice due to its user-friendly design and versatility.
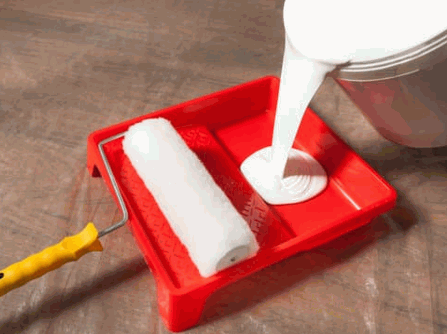
Choosing the appropriate paint, such as Zinsser Allcoat, Cabinet Coat, or Insl-X, is essential for the success of a spray-painting project, as it significantly influences both the durability and appearance of kitchen cabinets.
The selection of paint not only affects the overall aesthetic but also determines the finish's ability to endure daily wear and tear. For example, using semi-gloss or satin finishes can provide a resilient surface that is easy to clean and resistant to moisture, making these options particularly suitable for high-traffic areas such as kitchens. Additionally, selecting paints specifically formulated for cabinetry can greatly enhance the longevity of the project.
Highlighted below are some recommended paint options:
When selecting colours, it is important to consider the overall kitchen design and choose shades that complement the existing décor while also reflecting personal style. It is advisable to test samples on the cabinets to visualise how colours appear under different lighting conditions before making a final decision.
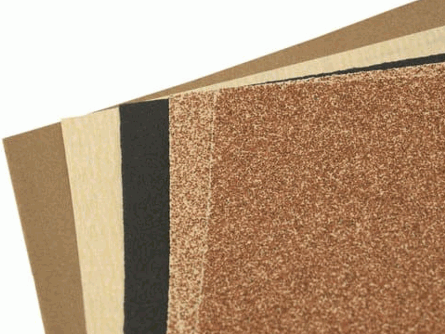
Sandpaper is an essential tool for preparing kitchen cabinets prior to spray painting, as it facilitates the creation of clean surfaces that enhance paint adhesion. By de-glossing the existing surface, sandpaper allows the new paint to bond more effectively, resulting in a longer-lasting and more durable finish. Selecting the appropriate grit of sandpaper is crucial to ensure that the cabinet surface is not damaged during the preparation process.
The significance of sanding cannot be overstated, as it has a profound impact on the overall outcome of the painting project. When selecting the appropriate sandpaper, the following considerations should be taken into account:
Employing proper sanding techniques, such as using a sanding block for even pressure and sanding in the direction of the wood grain, can further enhance the effectiveness of the process. This meticulous attention to detail not only ensures the surface is adequately prepared but also establishes the foundation for an impeccable finish.
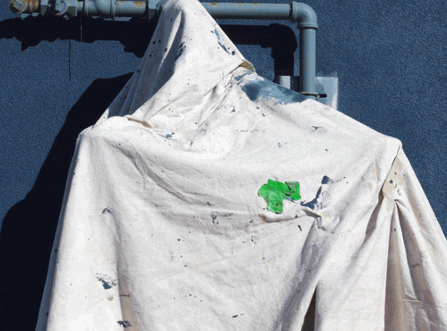
Drop cloths are essential during the spray-painting process, providing critical protection for floors and surrounding areas from overspray and paint drips. They represent a vital component that should not be overlooked, as using drop cloths can prevent costly damage and assist in maintaining the aesthetic integrity of your home. Without proper coverage, paint can easily splatter onto furniture, walls, or flooring, resulting in undesirable mishaps and extended cleanup efforts.
Among the various types of drop cloths available, the following are noteworthy:
When employing drop cloths, it is imperative to ensure they are adequately secured and overlap appropriately to cover the necessary areas. Effectively utilising these protective layers not only safeguards your belongings but also enhances the overall quality of your painting endeavours.
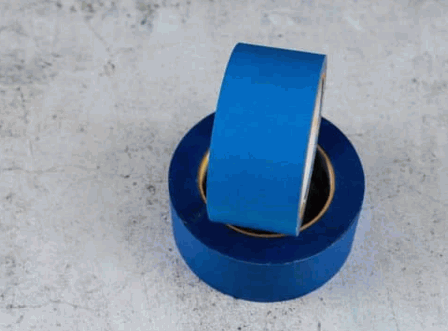
Painter's tape is an essential tool for achieving clean edges and precise lines when spray-painting kitchen cupboards. Proper masking with painter's tape effectively isolates areas that should remain unpainted, ensuring a professional-looking result. The selection of high-quality painter's tape is crucial, as it can prevent bleed-through and facilitate easier removal without causing damage to the underlying surfaces.
To fully maximise the effectiveness of this vital tool, it is important to understand its various applications and techniques. For example, ensuring that the tape runs parallel to the edge being painted not only guarantees precision but also minimises the risk of paint seeping underneath.
Some effective techniques include:
When the time comes to remove the tape, it is advisable to do so while the paint is still slightly wet. This approach allows for a cleaner edge and reduces the likelihood of peeling paint. Such practices underscore the importance of proper masking and skilful techniques in achieving a professional finish.
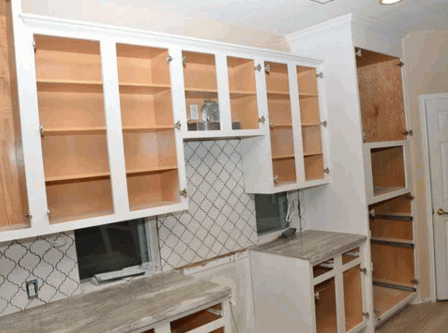
Spray-painting kitchen cabinets involve several essential steps that contribute to a successful and high-quality result, beginning with meticulous preparation. The process starts with the removal of cabinet doors and drawer fronts, which must be thoroughly cleaned and sanded to enhance paint adhesion.
Following this, the application of a primer is crucial for establishing an appropriate surface for the topcoat. Careful application of paint using a paint sprayer is the next step in the process.
A comprehensive understanding of each phase, including drying times and the requirement for multiple coats, is vital for achieving aesthetically pleasing and durable painted cabinets.
Preparing the cupboards is a fundamental step in the spray-painting process, ensuring that surfaces are thoroughly cleaned and optimally prepared for paint application. This process involves removing any grease, grime, or old finishes from the cupboard doors and drawer fronts, followed by sanding to create a rough surface that enhances paint adhesion. De-glossing is another essential aspect, as it facilitates a more effective bond between the paint and the substrate, thereby improving the overall durability of the finished product.
Along with cleaning and sanding, it is imperative to implement safety measures to protect oneself during the preparation process. Using respirators and safety goggles is recommended to safeguard against dust and fumes.
The cleaning process can be enhanced by employing:
When sanding, it is advisable to use fine-grit sandpaper to smooth surfaces efficiently while avoiding gouges. It is essential to sand in the direction of the grain to achieve an even finish. Additionally, de-glossing with an appropriate product is crucial; this step ensures robust adhesion of the paint while providing a finish that can withstand wear and tear, ultimately extending the lifespan of the cupboard surfaces.
Sanding the cabinets is an essential procedure that ensures clean surfaces and enhances paint adhesion, which is critical for the durability of a spray-paint application. By employing the appropriate grit sandpaper, one can effectively remove any existing finishes, smooth out imperfections, and create a texture that allows the new paint to adhere properly. It is advisable to sand meticulously while exercising caution not to damage the underlying wood or material of the cabinets during this process.
The sanding process extends beyond mere abrasion; it establishes a foundation for a flawless paint application. To optimise results, selecting the correct sandpaper is imperative. Generally, medium-grit sandpaper (approximately 120-150 grit) is suitable for initial sanding, while finer grits (220 grit or higher) are recommended for smoothing the surface prior to painting.
The following guidelines should be considered:
Mastering this sanding technique will significantly improve paint adhesion, ultimately resulting in a more durable and aesthetically pleasing finish on the cabinets.
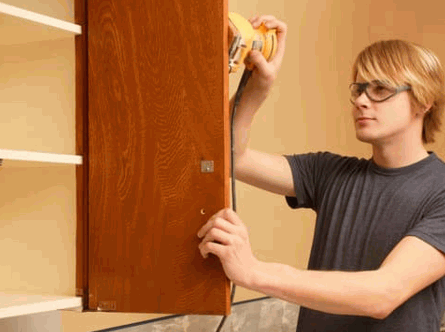
Cleaning the cabinets is a crucial step that follows sanding, as it ensures the removal of all dust and debris, thereby creating pristine surfaces for painting. Using a solution such as sugar soap effectively degreases and cleans cabinet doors and drawer fronts, preparing them for optimal paint adhesion. This step is vital because any residual dust or grime can adversely affect the quality of the paint job, potentially resulting in peeling or uneven finishes.
To achieve the best results, various cleaning solutions and techniques are available. For example, a mixture of vinegar and water serves as a natural degreaser, which is particularly effective in kitchens where grease tends to accumulate. Alternatively, the use of a commercial all-purpose cleaner or a mild washing-up liquid can also yield satisfactory results. For an even more professional approach, consider using Zinsser Allcoat for superior surface preparation.
It is essential to apply these solutions with a soft cloth or sponge, ensuring that all surfaces are thoroughly wiped down. Rinsing the cabinets with clean water after applying any cleaning solution is important to prevent residue from interfering with paint adhesion.
Ultimately, a well-cleaned cabinet sets the stage for a remarkable transformation, resulting in outcomes that endure the test of time, especially when paired with products like Benjamin Moore paint.
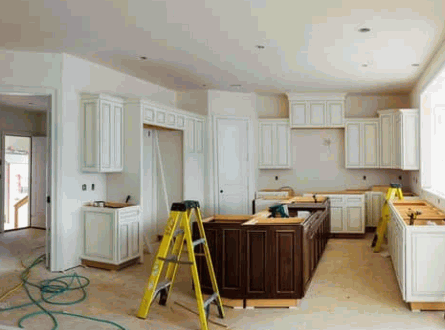
Priming the cupboards is an essential step that establishes an appropriate bonding surface for the topcoat, significantly enhancing paint adhesion and durability. A high-quality primer, such as Stix Waterborne Bonding Primer or Insl-X, effectively seals the surface and prevents tannins or stains from bleeding through the final coat. This process not only improves the overall finish but also extends the longevity of painted cupboards, ensuring they maintain their aesthetic appeal for years to come.
In the realm of kitchen cupboard refinishing, selecting the right primer is crucial for achieving outstanding results. Both water-based and oil-based primers present distinct advantages; water-based primers dry quickly and emit low odours, while oil-based options excel in stain-blocking capabilities. For individuals seeking versatility, hybrid primers also offer an optimal balance.
When applying the primer, it is advisable to use a high-quality brush, roller, or even a Wagner Flexio 5000 for a smooth, even coat. Special attention should be given to corners and edges, applying a thin layer to minimise drips. It is imperative to allow sufficient drying time in accordance with the manufacturer's instructions before proceeding with the topcoat; this practice will not only enhance adhesion but also contribute to a flawless finish of the freshly painted cupboards.
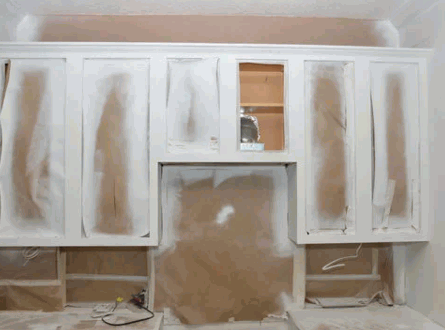
Spraying the cupboards is a critical phase in the painting process, where the selected paint is applied using a spray technique to achieve a flawless and even finish. Using a Wagner Flexio or HVLP spray gun can enhance the quality of the application. It is essential to maintain a consistent distance from the surface while employing smooth, sweeping motions to prevent drips or pooling. Depending on the type of paint and the desired finish, multiple coats may be required to achieve optimal coverage, with appropriate drying times observed between applications to ensure a durable final result.
Before commencing, it is vital to prepare the area by covering nearby surfaces, as aerosol paint can easily overspray. Utilise a paint booth or 3M hand masker to protect the surrounding environment.
The optimal technique involves holding the spray gun at a distance of approximately 15 to 30 centimetres from the cupboard's surface to ensure an even distribution of paint.
After applying the first coat, it is important to allow it to dry according to the manufacturer's recommendations, typically between 30 minutes to one hour. For best results, applying light coats is crucial; heavy applications may result in drips and necessitate additional sanding. Patience is essential—ensuring that each layer dries properly will enhance the durability and quality of the paint finish.
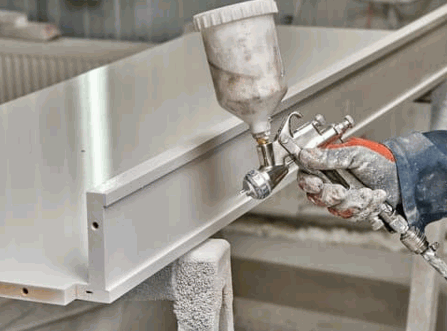
Allowing sufficient drying time is crucial after spraying cabinets, as it ensures that the paint cures appropriately and adheres effectively to the surface. Depending on the type of paint used, it may be necessary to apply multiple coats to achieve the desired quality finish, making adherence to the manufacturer's instructions regarding drying times between applications essential.
Exercising patience during this phase will ultimately result in a more durable and aesthetically pleasing final product.
Understanding the importance of drying time is vital for achieving optimal results. Different paint formulations, such as emulsion, oil-based, and spray paints, exhibit varying drying times, which can range from a few hours to several days. This variability underscores the need to monitor environmental conditions, including humidity and temperature, as they can significantly influence the duration required for the surface to dry adequately.
To ascertain if the paint is dry, one should gently touch the surface in an inconspicuous area; if it feels tacky or leaves a mark, additional curing time is necessary.
By allowing the appropriate amount of time for drying, the finished product will exhibit a flawless appearance and enhanced longevity.
Removing painter's tape with care is the final step in the spray-painting process, allowing for the revelation of the clean edges and lines that have been diligently achieved. Once the tape is removed, reattaching the cupboard hardware becomes essential, as it can significantly alter the overall appearance of the painted cupboards.
Ensuring that all finishing touches are meticulously in place not only enhances the quality of the paint job but also completes the kitchen makeover, providing a remarkable aesthetic update to the space.
In the pursuit of a flawless finish, it is crucial to exercise patience and precision during the tape removal process. As the tape is peeled back, it is advisable to do so slowly at a 45-degree angle to prevent any unintended lifting of the paint.
Following this careful procedure, the installation of the selected cupboard hardware, such as Moen handles, plays a pivotal role in influencing the kitchen's overall appearance.
These final touches reflect a commitment to detail and have the potential to elevate the space from ordinary to extraordinary, contributing significantly to a successful home renovation.
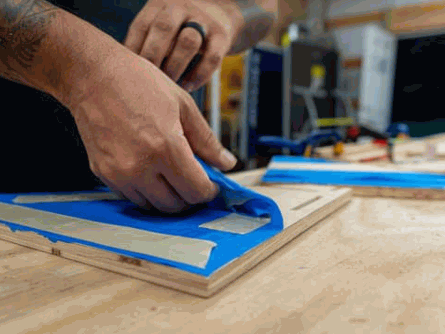
Successfully spraying kitchen cupboards necessitates meticulous planning and execution, along with several key strategies that can significantly enhance the overall quality of the project. Foremost among these is the use of appropriate safety gear, including masks and goggles, to protect oneself from paint fumes and particles. Using products like Rustoleum for durability and Frenchic Al Fresco for style can make a substantial difference.
Furthermore, practising the spray technique on a scrap piece of wood is advisable to refine the approach prior to addressing the actual cupboard surfaces. By integrating these precautions with strategic planning, one can achieve a successful and satisfactory outcome.
Practising on a scrap piece of wood prior to spray-painting kitchen cabinets is an essential step that aids in refining spray techniques and increasing confidence.
This practice session provides an opportunity to adjust the sprayer settings, learn to control the distance, and understand the paint flow, ultimately resulting in more consistent outcomes when painting the actual cabinets. With sufficient practice, individuals will become more acquainted with the intricacies of paint application, ensuring an even and professional-quality finish. Consider consulting The Paint Shed for expert advice and supplies.
Experimenting on scrap materials can introduce valuable techniques, such as:
Through dedicated practice, individuals will not only enhance their skills but also cultivate a sense of artistry that can significantly elevate their spray-painting projects.
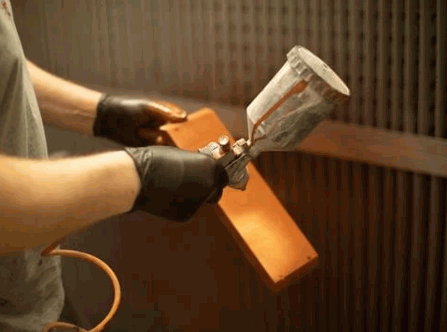
Utilising a high-quality paint sprayer, such as the Wagner Flexio 5000, is essential for achieving an efficient and professional paint application when spraying kitchen cabinets. A superior sprayer not only accelerates the application process but also ensures a uniform finish that enhances the overall aesthetics of the cabinets. Investing in the appropriate equipment can significantly influence the ease of the project and the quality of the final results.
When selecting a paint sprayer, several key features should be considered to maximise efficiency and accomplish the desired outcome:
Additionally, the type of paint sprayer—whether airless, HVLP (High Volume Low Pressure) or pneumatic—plays a crucial role in the adherence and levelling of the paint on surfaces. Selecting the appropriate sprayer not only enhances work efficiency but also improves the quality of the final application.
Working in a well-ventilated area is essential when spray-painting kitchen cabinets, as it significantly mitigates the risks associated with paint fumes and ensures a safer environment during the painting process. Proper ventilation not only protects one’s health but also facilitates the drying process, ultimately contributing to a superior finish. It is imperative to wear appropriate safety gear, such as masks, to further minimise exposure to harmful particles while working.
To achieve adequate airflow, it is advisable to open windows and doors to create cross-ventilation, which will assist in dispersing any fumes. Additionally, utilising box fans to direct air outside can enhance circulation in the workspace. It is crucial to avoid painting in confined spaces without proper exhaust systems, as this may lead to a rapid accumulation of harmful vapours.
Adequate ventilation is directly correlated with the quality of the paint job; proper airflow ensures a smooth application and a flawless finish. By prioritising safety and airflow, one can achieve not only a professional-grade appearance but also a significantly safer working environment.
Taking the necessary time and exercising patience are essential components in the successful spray-painting of kitchen cupboards. Rushing through the process can lead to unsatisfactory results. Allowing adequate drying time between multiple coats is crucial for achieving a quality finish, as it ensures proper adhesion of the paint and promotes an even application.
A considered approach to each step in the painting process will ultimately yield a more polished and professional outcome.
Achieving the ideal painted surface on kitchen cupboards not only enhances their aesthetic appeal but also extends their longevity. To ensure a high standard of work, consider the following recommendations during the painting process:
Rushing through these procedures not only compromises the finish but also necessitates corrective actions that can be time-consuming. The key to achieving a beautiful result lies in a thoughtful and deliberate approach.
Utilising light coats during the spray-painting process is essential for achieving a smooth finish, as thicker applications can result in runs and uneven surfaces. The application of multiple light coats facilitates better paint adhesion and allows for a more controlled application, ensuring that the final result is both aesthetically pleasing and durable. This technique enhances the overall appearance while minimising paint wastage and the need for excessive touch-ups.
To optimise the effectiveness of light coats, several techniques should be considered. First, it is crucial to maintain a consistent distance from the surface, ideally between 15 to 30 centimetres, to ensure an even distribution of paint. Employing a back-and-forth or circular motion can help prevent pooling, which is often a consequence of heavier applications.
By adhering to these guidelines, individuals can achieve a pristine, professional-looking finish while minimising the common pitfalls associated with paint application.
